Zenair Float Owners
Drawings and assembly instructions:
|
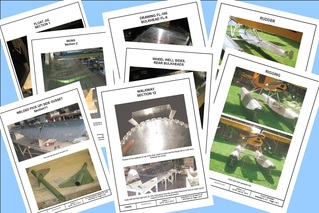
Exploded-view drawings and assembly manuals are available on-line for all customers assembling their own Zenair Float kit. All our manuals etc. are in PDF format; you may download and print them as needed to assist with the assembly. We periodically update our documents, so make sure you have the latest version.
Click here for these "TECH PAGES" These resources are password protected; qualified kit owners may request the necessary password free of charge by following these simple steps. |
 |
Operations Manual, Maintenance Manual and/or Check-Lists:
By their nature, non-certified Zenair Floats fall into the "Experimental" category (like most of the aircraft they will be installed on). As such, the original builder/owner-of-record is considered the manufacturer of the floats (as with self-built kitplanes).
Just like with amateur-built aircraft (that are each considered "unique"), it is the manufacturer's responsibility to adequately test the equipment and to subsequently create the appropriate related Operating Manual, Maintenance Manual and/or any check-list deemed necessary to properly operate the equipment. These documents can be as complete and complex or as short and simple as desired by the manufacturer (the builder). Zenair does NOT offer/sell such customized manuals or check-lists (just the generic instructions needed to assemble the float kits). For sample manuals or check-lists, you will need to find other owners with similar floats that are willing to share their own documents (i.e. through online blogs, forums, etc. is the easiest way for many...).
Buying Second-Hand Zenair Floats:
Occasionally, you will find used Zenair floats for sale on the second-hand market. Potential buyers should be aware that these floats were likely assembled by an amateur-builder and that the quality of workmanship can vary greatly from one such builder to another. Inspect the floats and workmanship closely before buying! Also, make sure to request and receive all related documentation such as invoices, packing slips, drawings, manuals, etc. (see above), so that you can properly operate, maintain and repair the floats as necessary. After you have purchased your floats, and in order to receive related technical support from Zenair, you will need to register the transfer of ownership with Zenair. Contact Zenair or AFM Inc. for the appropriate form ([email protected]).
WARNING: Do NOT confuse floats (or float kits) supplied by CZAW with Zenair Floats! Floats made by CZAW are highly modified Zenair floats using European measurements and accessories. Parts are not interchangeable and Zenair does NOT carry or manufacture parts for CZAW floats. Sorry, but we cannot assist you if you have CZAW floats.
Ongoing Airworthiness:
For the latest service information on Zenair Floats, please see http://www.zenairfloats.info/service-letters.html
(No password necessary)
For the latest service information on Zenair Floats, please see http://www.zenairfloats.info/service-letters.html
(No password necessary)
General Float-Plane Information

A great site for Float-plane Pilots, with many links to related resources!
| seaplane-training-ac61-21a.pdf |
|
| ||
| seaplanesafty-ac91-69a.pdf |
NOTICE: If you are considering Zenair Floats for a Type-Certificated aircraft (NOT EXPERIMENTAL), please read the Q&A.
Save money by assembling your own floats; order this DVD to see how...
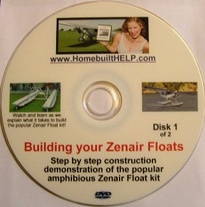
Although based on Zenair's older, less-advanced Basic Parts Kits (BPK), the "Building your Zenair Floats" DVD by US-based HomebuiltHELP.com is still a great tool to assist with the jigging and the assembly of newer Standard Parts Kits (SPK).
When assembling from a new Standard pre-drilled kit, you'll be able to skip all the marking and drilling that was required with the Basic Parts Kit (BPK) illustrated in this DVD... I many cases, you'll be able to simply use the predrilled skins in the new kits as templates for drilling, with virtually no measuring or marking of individual holes necessary... The DVD also offers more guidance regarding the application of corrosion-protection and the provided 3M sealer between the parts.
When assembling from a new Standard pre-drilled kit, you'll be able to skip all the marking and drilling that was required with the Basic Parts Kit (BPK) illustrated in this DVD... I many cases, you'll be able to simply use the predrilled skins in the new kits as templates for drilling, with virtually no measuring or marking of individual holes necessary... The DVD also offers more guidance regarding the application of corrosion-protection and the provided 3M sealer between the parts.